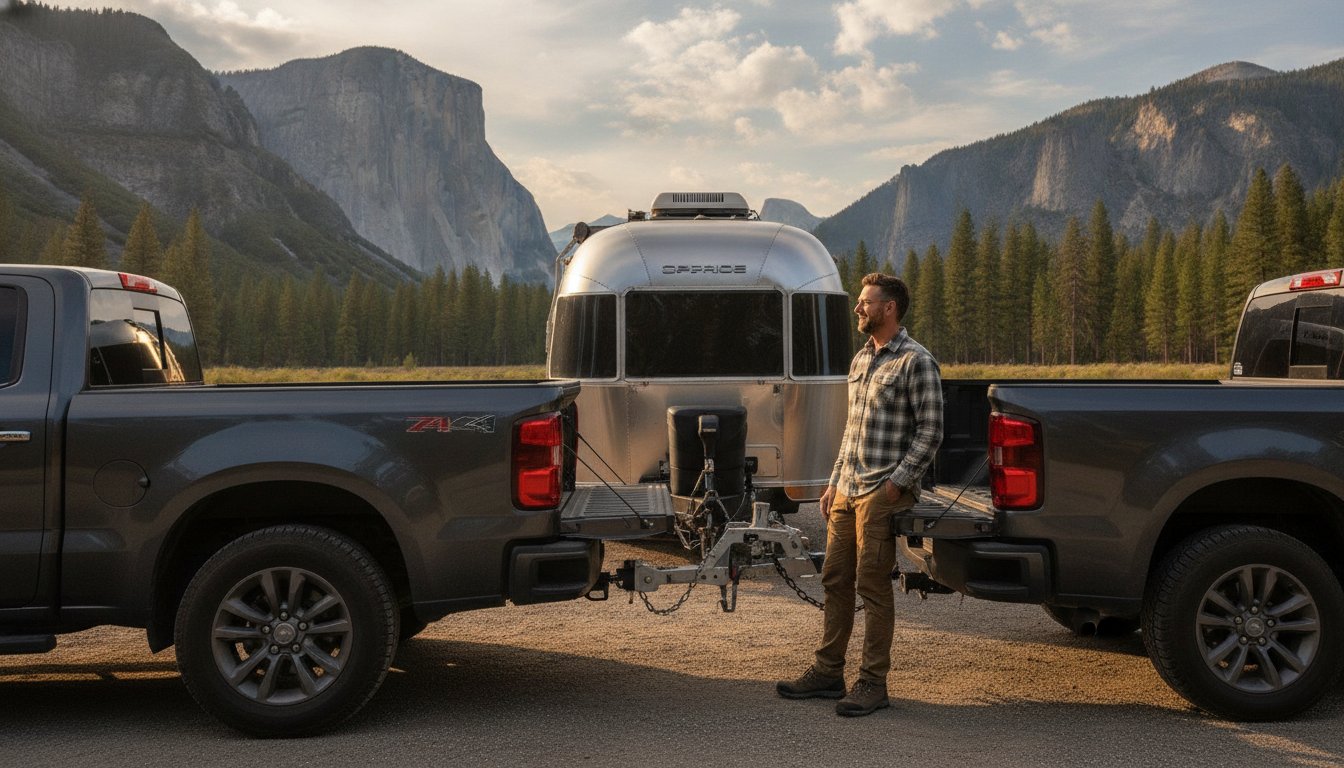
What if the key to total towing control isn't just about tighter bolts, but about mastering the laws of physics before you even pull out of the driveway? Most responsible owners feel a surge of anxiety when they first look at a high-performance system and wonder how to install a ProPride hitch without making a critical error. It's natural to worry about weight distribution or the intricacies of pivot point projection, which is the mechanical design that projects the trailer's pivot point forward to the tow vehicle's rear axle. You've likely realized that traditional friction-based hitches are a compromise you're no longer willing to make.
This guide will show you exactly how to master the precision required to achieve a perfectly level tow and a completely sway-free experience. By following these steps, you'll honor the Jim Hensley design legacy and gain total confidence in The Best Hitch on the Planet. We'll walk through every mechanical detail, from the initial convergence of the hitch components to the final torque checks, ensuring your setup meets The Responsible Towing Standard. You're about to transform your travel experience from a stressful chore into a stable, predictable journey.
Key Takeaways
- Learn why starting on level ground is non-negotiable for accurate weight distribution and how the Jim Hensley design legacy informs every step of your setup.
- Discover how to install a ProPride hitch using a step-by-step approach that prioritizes mechanical precision over guesswork to ensure your safety system functions exactly as engineered.
- Master the alignment of the main unit and link technology to fully activate Pivot Point Projection, which is the mechanical secret to the total elimination of trailer sway.
- Use simple wheel well measurements to calibrate your V2 jacks, allowing you to return your tow vehicle's front axle to its ideal load and uphold The Responsible Towing Standard.
- Establish a professional maintenance routine, including specific greasing points, to protect your investment and keep "The Best Hitch on the Planet" performing at its peak for years.
Preparing for Your ProPride 3P® Hitch Installation
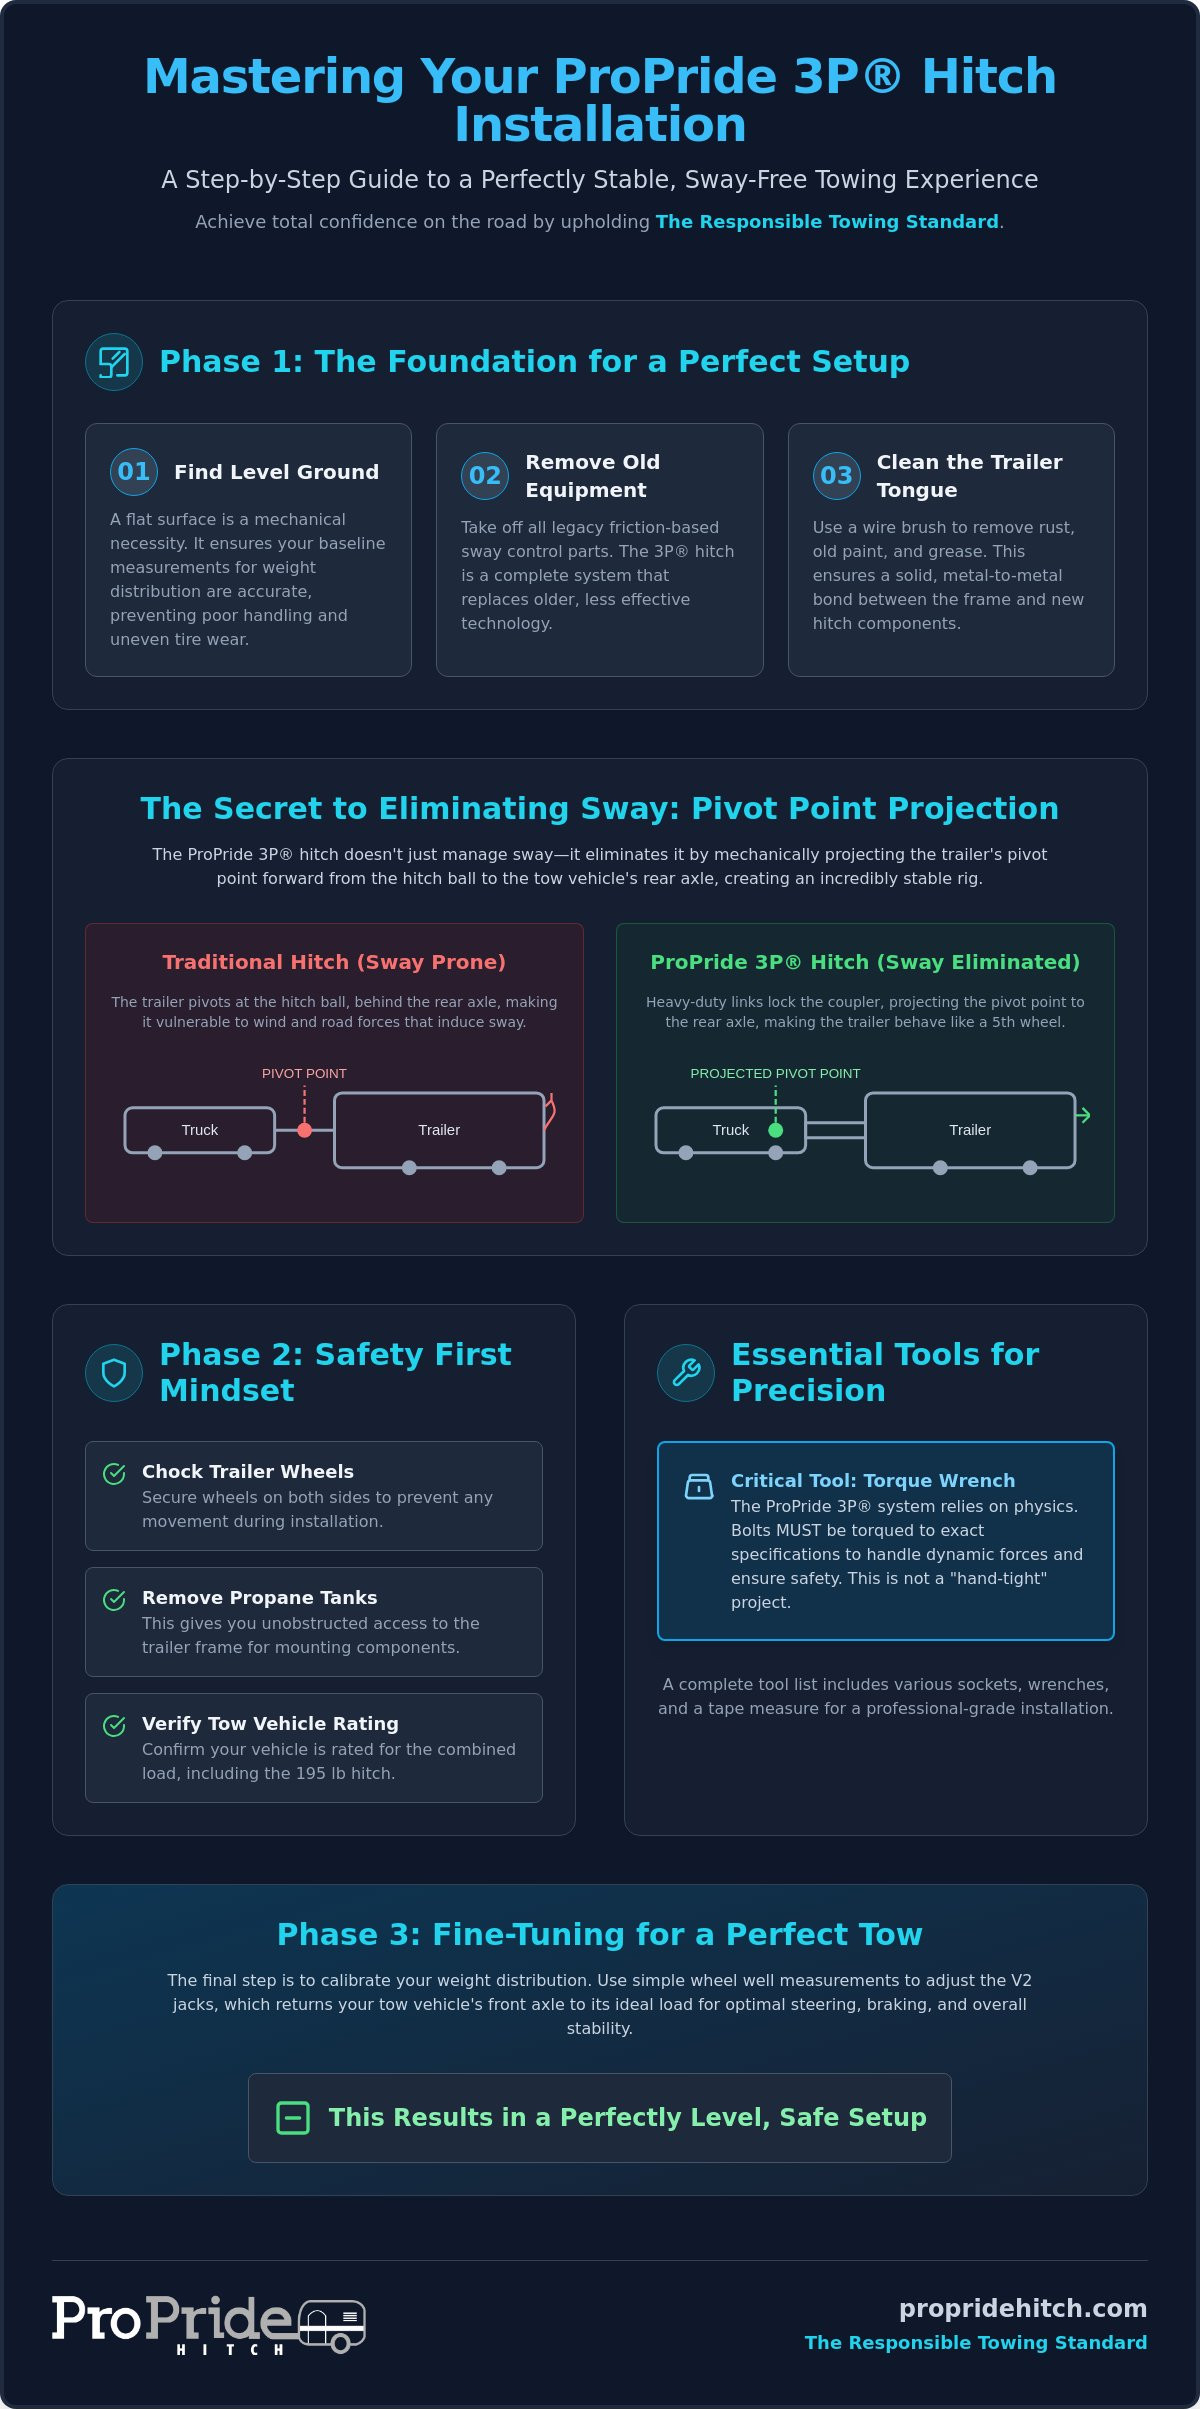
Success in the towing world begins long before you hit the highway. When you're learning how to install a ProPride hitch, your first task is to create a controlled environment. You need a flat, level surface like a concrete driveway or a professional garage floor. This isn't just for your comfort; it's a mechanical necessity. If your trailer and tow vehicle aren't level at the start, your baseline measurements for weight distribution will be inaccurate. This can lead to poor handling and uneven tire wear down the road.
Before you open the boxes, you must remove all legacy friction-based sway control equipment. Traditional hitches are often considered "good enough" for casual users, but they can't compete with the engineering of the ProPride 3P Hitch. Clean the trailer tongue thoroughly with a wire brush. Removing old paint, grease, and rust ensures a solid, metal-to-metal bond between the frame and the hitch components. This level of diligence is what separates a standard setup from one that truly meets The Responsible Towing Standard.
To better understand the mechanics of this system in action, watch this helpful video:
The Responsible Towing Safety Mindset
Safety is the cornerstone of the Jim Hensley design legacy. Before uncoupling your current setup, chock your trailer wheels securely on both sides. You don't want the trailer shifting even an inch during the mechanical transition. It's also a smart move to temporarily remove your propane tanks. This gives you unobstructed access to the trailer frame, making it much easier to mount the V2 jacks and the main yoke assembly without hitting obstacles. Finally, double-check your tow vehicle's manual. Ensure your truck is properly rated for the total combined load of your trailer and the 195 lbs of "The Best Hitch on the Planet."
Pre-Installation Component Checklist
Organization is a hallmark of a responsible owner. Lay out all components from the shipping manifest and group them by sub-assembly: the main unit, the jacks, and the yoke. This is the perfect time to inspect your trailer coupler for existing wear or structural damage. The ProPride 3P is a sophisticated weight-distributing hitch that relies on a secure connection to function. By verifying every bolt and link now, you prevent delays and ensure the pivot point projection technology can work its magic. Taking these steps demonstrates your commitment to acting responsibly through preparation and knowledge.
Essential Tools and Engineering Components
Precision is the hallmark of a responsible owner. To understand how to install a ProPride hitch, you must first respect the tools that make its performance possible. A high-quality torque wrench is your most critical safety instrument. While many DIY projects allow for "hand-tight" estimations, the ProPride 3P® system operates on the immutable laws of physics. Bolts must be torqued to exact specifications to handle the dynamic forces of a multi-ton trailer. This ensures the main unit remains a rigid extension of your trailer frame, which is vital for the system to function as designed. If you haven't secured your equipment yet, you can view the full specifications of the 3P system to see exactly what's involved.
The heart of this system is the ProPride 3P® Main Unit. It works in conjunction with the Adjustable Hitch Bar to ensure your trailer and tow vehicle remain perfectly level. Unlike traditional equipment, the ProPride 3P® Yoke prevents the coupler from pivoting on the ball. By locking this connection, the hitch forces all movement through the heavy-duty link system, effectively moving the pivot point forward. This design represents the evolution of the original Hensley design, offering a level of stability that friction-based alternatives simply can't match. It's a professional-grade solution for those who refuse to compromise on safety.
The Required Tool Kit for Precision Setup
A successful installation requires more than just a standard toolbox. You'll need deep well sockets and open-ended wrenches ranging from 9/16” to 1-1/8”. These sizes are necessary to secure the heavy-duty hardware that anchors the hitch to your trailer’s A-frame. Additionally, keep a high-capacity grease gun loaded with all-purpose marine-grade grease nearby. Lubricating the Zerk fittings during the initial setup is essential for long-term durability. Finally, a standard measuring tape is required to calibrate your V2 weight distribution jacks, ensuring you achieve the level stance required by The Responsible Towing Standard. Taking the time to gather these tools now prevents frustration later.
Understanding Pivot Point Projection Technology
The ProPride 3P® is often called "The Best Hitch on the Planet" because of its patented Pivot Point Projection technology. This system uses 3/4" thick steel links that physically shift the trailer's pivot point forward toward the tow vehicle's rear axle. Traditional friction hitches only try to mask the movement after it starts. By contrast, our design uses geometry to make sway mathematically impossible. Understanding the physics of trailer sway reveals why this mechanical advantage is so superior. The V2 Weight Distribution Jacks provide the necessary leverage to distribute weight across your axles, giving you total control and peace of mind on the open road. If you're ready to upgrade your towing experience, explore the possibilities at propridehitch.com.
Step-by-Step Installation of the ProPride 3P®
Now that your workspace is clear and your tools are ready, it's time to begin the assembly. Precision isn't optional here. When you're determining how to install a ProPride hitch, the first physical step involves configuring the adjustable hitch bar to match your specific vehicle and trailer combination. This component is the bridge between your truck and the pivot point projection technology that keeps you safe. By taking your time now, you're upholding The Responsible Towing Standard and ensuring a lifetime of stable travels.
Setting the Hitch Bar Height and Tilt
Start by measuring from the ground to the top of your trailer coupler while the trailer is perfectly level. Next, measure the height of your tow vehicle's receiver. The adjustable hitch bar allows you to account for these differences by moving the hitch head up or down in one-inch increments. You'll also want to apply a slight rearward tilt to the hitch bar. This tilt is a calculated mechanical adjustment that helps the spring bars efficiently transfer weight to the front axle of your truck. It's a simple step, but it's vital for achieving that perfectly level stance you're after.
Securing the Main Unit and Yoke Assembly
Lower the trailer coupler onto the hitch ball within the main unit and secure the latch as you would with any standard connection. Once the ball is seated, you'll install the ProPride 3P® yoke. This heavy-duty component is what stops the coupler from pivoting on the ball, forcing the trailer to move only through the link system. You must torque the yoke bolts to the exact specifications found in your manual to prevent any lateral movement. If these bolts are loose, the system won't be able to project the pivot point forward as intended.
After the main unit is secure, you'll move on to the frame brackets and weight distribution jacks. Here's a practical tip for your setup:
- Check for Obstructions: Ensure the V2 jacks are mounted far enough back on the frame to avoid interference with your battery boxes or propane tank supports.
- Link Clearance: Before tightening everything down, move the main unit through its full range of motion. The 3/4" thick links should move freely without hitting the trailer frame.
- Spring Bar Alignment: Slide the spring bars into the main unit and connect them to the jacks. These bars should be parallel to the trailer frame when under initial tension.
Following this methodical approach ensures that every component works in harmony. You aren't just bolting parts together; you're calibrating a safety system designed to protect your family and your investment. If you ever feel unsure about a specific measurement, remember that how to install a ProPride hitch is a process of self-education that pays off in total peace of mind on the open road.
Fine-Tuning Your Weight Distribution for Safety
Mechanical assembly is only half the battle. To truly master how to install a ProPride hitch, you must understand the calibration of weight distribution. This is where engineering meets the road. When you drop your trailer onto the hitch, the weight naturally levers the front of your truck upward, unloading the front tires and compromising steering control. Your goal is to use the V2 jacks to return that front axle to its original load, ensuring your vehicle handles exactly as the manufacturer intended. This process isn't just about leveling your rig; it's about maintaining the traction required for emergency maneuvers and uphill climbs.
Start by measuring the distance from the ground to the top of your front wheel well while the truck is unhitched. Once the trailer is attached and the full tongue weight is applied, measure again. You'll notice the height has increased. By cranking the V2 jacks, you apply tension to the spring bars. This tension acts as a bridge, transferring weight forward to the front wheels and backward to the trailer axles. Finding the "sweet spot" for your specific truck and trailer combination often involves small, half-inch adjustments to the jack height until the front wheel well returns to its original unhitched measurement. This precision is what defines The Responsible Towing Standard.
Achieving the Perfect Level Tow
A nose-high trailer is a significant safety risk on the highway. It shifts the trailer's center of gravity backward, which can induce instability and reduce the effectiveness of your braking system. By adjusting your hitch bar height and jack tension, you should aim for a perfectly level or slightly nose-down configuration. This setup improves aerodynamics and keeps the Pivot Point Projection geometry in its optimal window. If you find the steering feels "light" or "floaty" at highway speeds, you likely need more tension on the jacks to restore front-end grip. Using a ProPride 3P Hitch allows for these micro-adjustments that traditional hitches simply can't accommodate.
The Final Safety and Torque Check
Metal components under thousands of pounds of pressure will inevitably settle during your first trip. After the first 50 miles of towing, pull over and re-verify the torque on every bolt, especially the yoke and frame brackets. Road vibrations can cause initial "seating" of the hardware, which might lead to a slight loss in tension. A final safety check serves as the definitive confirmation that your precision installation has successfully transitioned from a static assembly to a dynamic, road-ready safety system. If you're ready to experience the total elimination of sway, you can secure your ProPride 3P system today to join the ranks of the most prepared drivers on the road.
Upholding The Responsible Towing Standard Post-Install
Completing the physical setup is a major milestone for any trailer owner. However, understanding how to install a ProPride hitch is only the first chapter of a long and safe journey. To maintain the precision of the Jim Hensley design legacy, you must commit to a routine maintenance schedule. This isn't just about preserving the high-quality steel; it's about ensuring the pivot point projection technology remains fluid and responsive. A well-maintained system is the only way to consistently meet The Responsible Towing Standard over thousands of miles of travel.
Ongoing Maintenance and Care Protocols
Lubrication is the lifeblood of this mechanical system. You should apply marine-grade grease to the Zerk fittings every 1,000 miles or before every major trip. Zerk fittings are small, nipple-like valves located on the main unit and spring bar bushings that allow you to inject grease directly into the moving parts. This prevents metal-on-metal friction that can lead to premature wear and noise. Additionally, make it a habit to check the hitch bar bolts for tightness. Even with the initial torque, road vibrations can eventually settle the hardware. Use a damp cloth to wipe away road salt and grime from the hitch head. Corrosive elements can damage the finish and hide early signs of stress or wear that a responsible owner needs to see.
- Grease Frequency: Apply fresh grease to all fittings every 1,000 miles to keep the links moving freely.
- Hardware Inspection: Re-verify the torque on the yoke and frame brackets before every cross-country journey.
- Finish Protection: Touch up any paint chips immediately to prevent surface rust from compromising the structural integrity.
The Safety Reward: Peace of Mind
The effort you've invested in learning how to install a ProPride hitch pays dividends every time a semi-truck passes you on the highway or a crosswind hits your trailer. When you feel the truck and trailer move as a single, stable unit, you're experiencing the ultimate reward for your diligence. This total elimination of sway isn't just a luxury; it's a critical safety feature that protects your family and your investment. Diligent preparation and ongoing care transform your towing experience from a source of anxiety into a stress-free part of your lifestyle. If you ever find that the system feels different or you need specific advice on adjustments, consult our ProPride 3P Hitch Troubleshooting guide for expert support.
By treating your ProPride 3P Hitch as a specialized partner in your travels, you ensure it remains "The Best Hitch on the Planet." Your commitment to acting responsibly through preparation and knowledge is what keeps the road ahead clear and predictable. You've moved beyond "good enough" equipment and embraced a higher standard of engineering excellence that will serve you for years to come.
Take Command of the Open Road
Mastering the mechanics of your safety system is a hallmark of a responsible owner. You've learned that the secret to a sway-free experience lies in patented Pivot Point Projection technology and a commitment to precision. By following the steps for how to install a ProPride hitch, you've ensured that your truck and trailer work in perfect harmony. You now have the tools to maintain your equipment through regular greasing and torque checks, upholding The Responsible Towing Standard every time you hitch up. This isn't just about a part; it's about the Jim Hensley design legacy protecting your family for a lifetime.
Choosing "The Best Hitch on the Planet" means you value engineering excellence over "good enough" solutions. With a lifetime warranty and a system designed to eliminate risk, you can finally focus on the destination rather than the dangers of the drive. If you're ready to transform your travel experience, it's time to Upgrade to the ProPride 3P® Hitch Today. Safe travels are no longer a matter of luck but a result of your diligent preparation. Your next adventure starts with the confidence of total control.
Frequently Asked Questions
Can I install the ProPride 3P hitch by myself, or do I need a professional?
Yes, you can install the ProPride 3P hitch yourself, as it's specifically designed for a direct-to-consumer setup process. Performing the installation yourself is a key part of The Responsible Towing Standard, as it allows you to fully understand the mechanics of your safety system. If you're comfortable using a torque wrench and following methodical technical instructions, you're well-equipped to handle this task without professional assistance.
How long does the typical ProPride hitch installation take for a first-timer?
A first-time installation typically takes between 2 and 3 hours to complete. This timeframe allows you to carefully organize your components, measure your vehicle heights, and ensure every bolt is torqued to the correct specification. Taking your time ensures the pivot point projection technology is calibrated perfectly for your specific rig, providing total peace of mind on your very first trip.
What is the most common mistake made during weight distribution hitch installation?
The most common mistake is failing to set up the workspace on a perfectly level surface. If your truck and trailer aren't level at the start, your wheel well measurements will be skewed, leading to incorrect weight distribution. Another frequent error is skipping the final torque check after the first 50 miles of towing. Hardware can settle under road loads, so re-verifying those connections is vital for long-term safety.
Do I need to drill into my trailer frame to install the ProPride 3P?
No, the ProPride 3P is a completely bolt-on system that requires no drilling or welding to your trailer frame. It utilizes heavy-duty brackets and jacks that secure firmly to the A-frame of your trailer. This preservation of your frame's structural integrity is a hallmark of the Jim Hensley design legacy, making it an ideal choice for premium trailers with specific frame requirements.
How much torque should be applied to the main hitch unit bolts?
You must refer to your specific installation manual for current torque specifications, as these values are critical for maintaining a rigid connection. Generally, the main unit bolts require high torque levels to handle the dynamic forces of the road. Using a high-quality torque wrench is non-negotiable when learning how to install a ProPride hitch correctly, as estimated tightness is never sufficient for this precision equipment.
What happens if my trailer is not level after the initial installation?
If your trailer isn't level, you can adjust the offset on the adjustable hitch bar or fine-tune the tension on your V2 jacks. A "nose-high" trailer can cause instability, so you should aim for a perfectly level or slightly "nose-down" stance. Small adjustments to the jack height can significantly impact weight transfer, helping you achieve the ideal balance required for safe highway speeds and responsive steering.
Can I use a ProPride 3P hitch with an Airstream or other unique trailer frames?
Yes, the ProPride 3P is specifically designed to fit Airstream, Jayco, and Grand Design trailer frames. Its versatile bracket system accounts for the unique propane tank and battery box configurations often found on these models. Because it avoids the limitations of traditional friction-based equipment, it provides a specialized solution that respects the engineering of your high-end investment without requiring permanent modifications.
How do I know if I have successfully eliminated trailer sway after installation?
You'll know you've succeeded when your tow vehicle and trailer move as a single, stable unit, even when passed by large semi-trucks or hit by crosswinds. The steering should feel firm and grounded, with no "fishtailing" or lateral movement from the trailer. Learning how to install a ProPride hitch properly results in a predictable driving experience where the geometry of the hitch prevents sway before it can even start.