The best upgrade for a cross-country trip may be the one you decide not to add. Every battery, solar panel, storage solution, or comfort feature adds weight, and some upgrades can create fit or compatibility issues. That’s why RV upgrades for cross country trips should start with the needs of your setup, not a shopping list.
It makes sense to want more power and comfort for long days on the road. But safety and towing stability deserve priority, especially when equipment could affect your RV’s available capacity or how your trailer handles. Before choosing an upgrade, check your RV and tow vehicle limits, then weigh the benefit against the added weight and any system changes it requires.
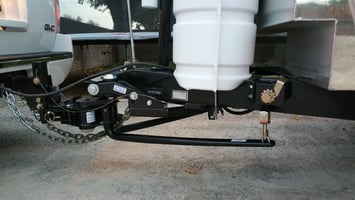
This guide compares practical improvements for safety, power, comfort, and towing, with a focus on choosing upgrades that work together. You’ll find points to consider before adding tire monitoring, electrical capacity, or a dedicated sway-control hitch such as the ProPride 3P Hitch. The goal is a travel-ready setup that supports confident towing and comfortable miles without carrying unnecessary gear. That’s The Responsible Towing Standard: prepare carefully and make every addition earn its place.
Key Takeaways
- Prioritize RV upgrades for cross country trips by safety and reliability first, then towing, power, and comfort.
- Use tire-pressure monitoring and visibility aids to support safer travel, while remembering they don’t replace regular checks or attentive driving.
- Match solar and battery upgrades to how you travel, and compare their dependencies and added weight before making changes.
- Check payload, fit, and system compatibility before buying. Available storage space doesn’t tell you how much weight your RV can carry.
- Consider sway control as part of a properly matched towing setup, not a guarantee against every road risk.
RV Upgrades for Cross-Country Trips: Decide What Your Setup Needs First
A long trip puts different demands on an RV than a weekend drive close to home. You may spend more hours towing, encounter changing road and weather conditions, and rely on onboard systems for longer stretches between stops. That doesn’t mean you need to replace or add everything. The right RV upgrades for cross country trips address the demands created by your route and travel style.
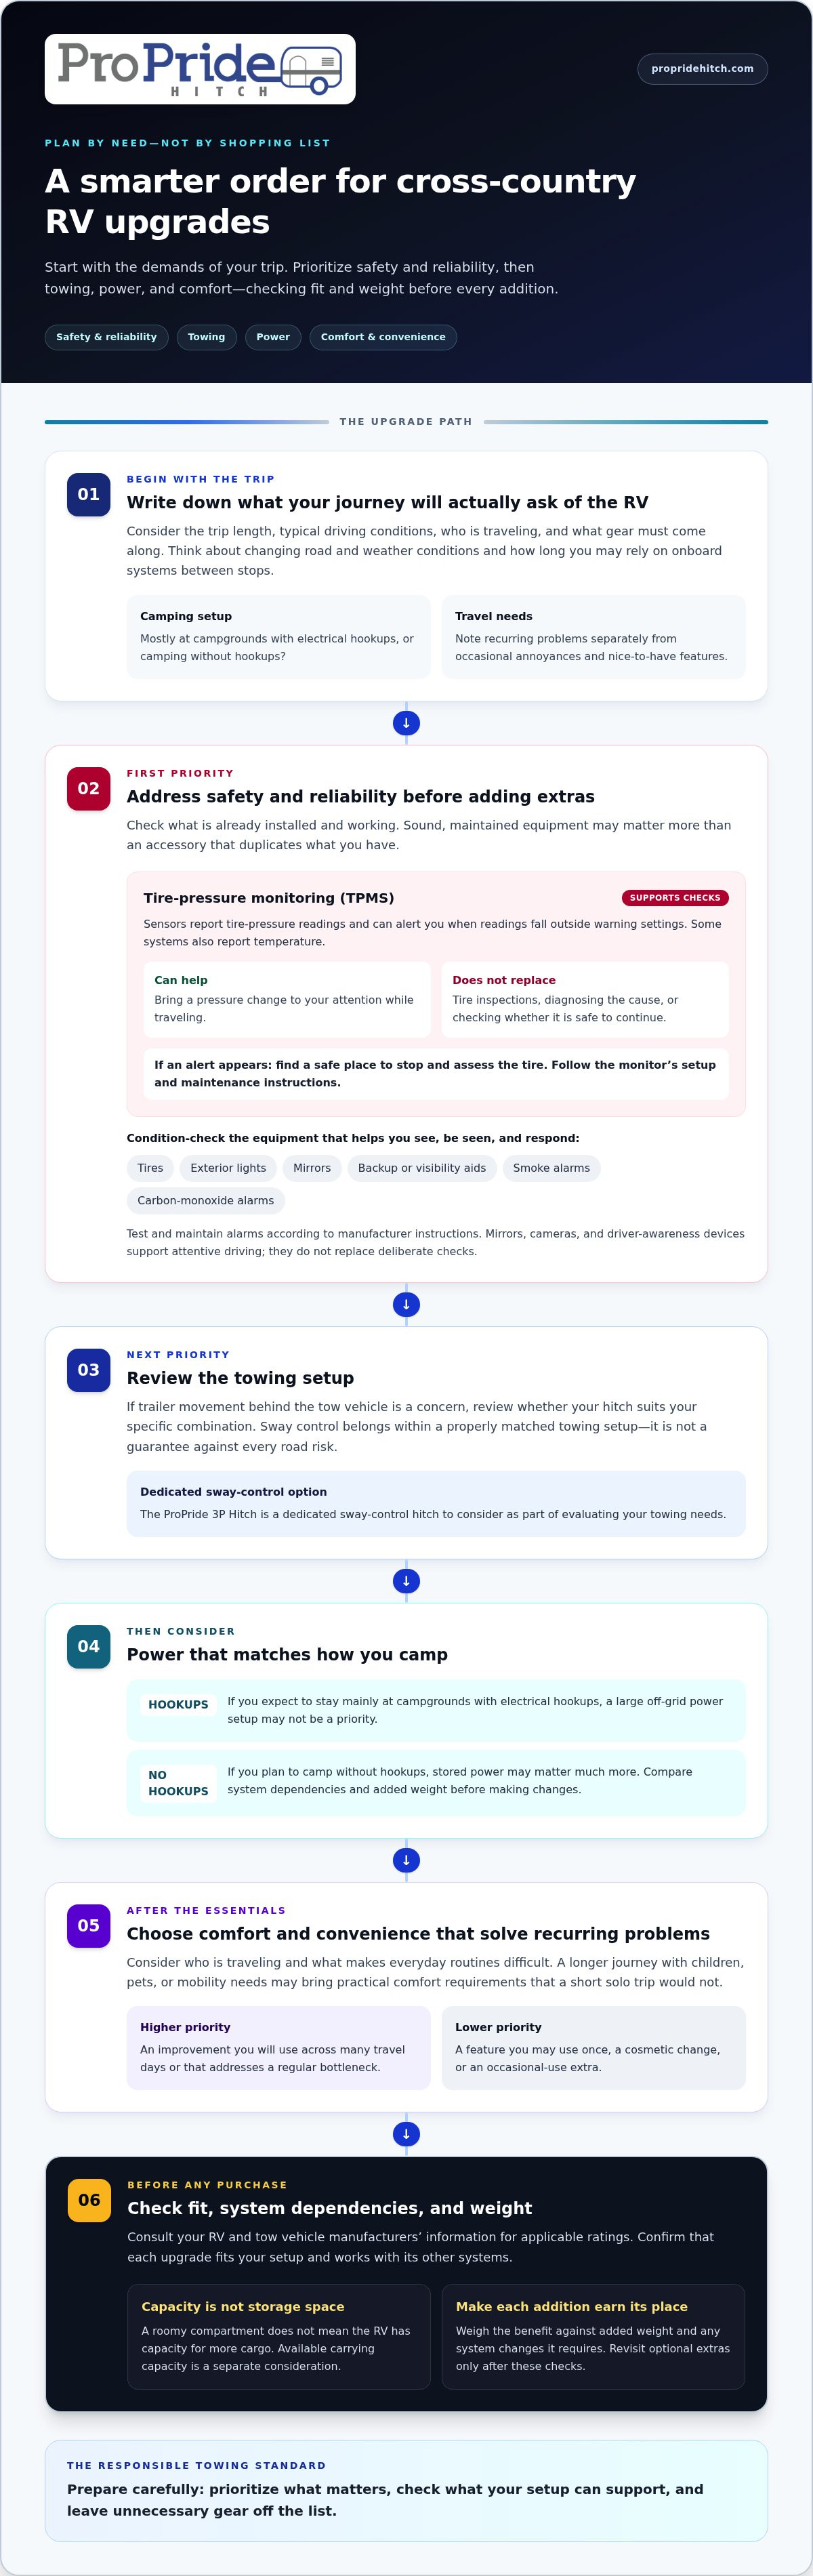
Start in this order: safety and reliability, towing, power, then comfort and convenience. A tire or equipment concern deserves attention before an entertainment upgrade. If trailer movement behind the tow vehicle is a concern, review whether your hitch suits your combination. The ProPride 3P Hitch is a dedicated sway-control option. Then consider power needs, followed by additions that make everyday routines easier.
Prioritize upgrades by the problem they solve, not by how appealing they look in a catalog. Start with your travel plans, then consider each item’s benefit, compatibility, and weight.
Which trip conditions should shape your RV upgrade list?
Think through the trip before comparing equipment. If you expect to stay mainly at campgrounds with electrical hookups, a large off-grid power setup may not be a priority. If you plan to camp without hookups, stored power may matter much more. The Recreational vehicle category covers a range of vehicle types and features, so begin with the systems in your particular RV, not assumptions about RVs in general.
Write down your trip length, typical driving conditions, who’s traveling, and what gear must come along. A longer journey with children, pets, or mobility needs may bring practical comfort requirements that a short solo trip wouldn’t. Separate recurring problems, such as difficulty monitoring tires or managing everyday power use, from occasional annoyances and nice-to-have features.
How can you rank upgrades before buying?
Use a simple test: What problem does this upgrade solve? How often will it matter? Can your RV support it? Put issues affecting safe operation, reliability, or your ability to complete the trip at the top. Next, rank improvements you’ll use across many travel days. A change that addresses a regular bottleneck is usually more useful than a feature you may use once.
Make a short list in priority order and note each item’s fit, system dependencies, and added weight. Defer cosmetic changes and occasional-use extras until you understand how they fit with the rest of your setup. A roomy storage compartment doesn’t mean the RV has capacity for more cargo. Available carrying capacity is a separate consideration.
- First: Resolve safety and reliability concerns.
- Next: Assess towing needs, then power requirements for your camping style.
- Then: Add comfort and convenience improvements that solve recurring problems.
- Last: Revisit optional extras after checking fit, dependencies, and weight.
Safety and Reliability Upgrades to Consider Before a Long RV Drive
Extra equipment can help you notice a developing problem, but it can’t replace sound components and regular attention. For RV upgrades for cross country trips, first check what’s already installed and working. A well-maintained tire, light, mirror, or alarm may contribute more to reliable travel than an accessory that duplicates equipment you already have.
Can tire monitoring make long-distance travel easier to manage?
A tire-pressure monitoring system (TPMS) reports pressure readings from sensors in the tires and can alert you when readings fall outside its warning settings. Some systems also report temperature, depending on their design. A TPMS can bring a change to your attention while traveling. It can’t explain what caused the change, identify every kind of tire damage, or replace tire inspections.
That’s the difference from occasional visual checks. A tire can lose pressure without looking obviously low, while a monitoring system can help you notice a change sooner. If an alert appears, find a safe place to stop and assess the tire. Don’t assume the system can diagnose the problem or that it’s safe to continue. Follow the monitor’s setup and maintenance instructions, and keep visual inspections in your routine.
Which safety equipment deserves a condition check?
Before departure, review the condition and operation of equipment that helps you see, be seen, and respond to hazards. Check tires, exterior lights, mirrors, backup or visibility aids, smoke alarms, carbon-monoxide alarms, and any other safety equipment installed in your RV. Test and maintain alarms according to their manufacturers’ instructions, including guidance for batteries or replacement. An alarm is useful only if it’s working as intended.
Mirrors, cameras, and driver-awareness devices can help you notice what’s around the RV, but they don’t replace attentive driving or deliberate checks before changing lanes or backing up. Use them as supporting tools. Confirm that lights work and that mirrors give you a useful view with the RV connected and loaded for travel.
Preparation also means understanding weight and equipment limits. Consult your RV and tow vehicle manufacturers’ information for the applicable ratings. The eCFR’s federal vehicle weight regulations provide a separate reference for Interstate weight limits. Those regulations aren’t a substitute for checking your specific vehicle ratings.
Inspect first, then add equipment to address a clear gap. If sway control is part of your towing review, the ProPride 3P Hitch uses Pivot Point Projection technology as part of its approach to trailer sway control. No single accessory removes every road risk, so match equipment to your setup and follow manufacturers’ maintenance guidance. That’s The Responsible Towing Standard: working equipment, informed decisions, and consistent attention.
Power, Comfort, and Convenience Upgrades: Compare What Adds Real Value
Power and comfort upgrades work best when they solve a routine problem. Solar can help replenish stored electricity, while a battery holds power for later. Neither works in isolation: existing wiring, charging equipment, appliances, and available carrying capacity all shape what makes sense. Compare an upgrade with the way you actually camp before choosing equipment.
| Upgrade | Best-fit travel need | Dependencies | Weight considerations |
|---|---|---|---|
| Solar panels | Generating electricity during daylight, especially when camping without hookups | Roof space, compatible charge controller, battery capacity, and wiring | Panels and mounting hardware add weight; consider the full installed system |
| Battery capacity | Storing electricity for evening or overnight use | Battery compatibility with the RV’s charging equipment and electrical system | Batteries can be a substantial part of the system’s added weight |
| Inverter | Running compatible household-style devices from stored battery power | Battery capacity, wiring, and the electrical demands of connected devices | Include the inverter, wiring, and related components in the weight assessment |
| Lighting improvements | Making repeated evening tasks easier with efficient, useful lighting | Fit with existing fixtures and electrical system | Small additions still count; avoid replacing working fixtures without a clear benefit |
| Climate or storage changes | Addressing recurring temperature discomfort or a regular organization problem | Available power, space, installation needs, and how the RV is used | Equipment and stored items both use carrying capacity |
When do solar and battery upgrades make sense?
Solar generates power; batteries store power for later use. If your routine involves daytime electrical use and time away from hookups, solar may help replenish the battery. If you need electricity after sunset, battery capacity matters. The two upgrades can complement each other, but adding panels alone won’t solve limited storage, and a larger battery won’t generate energy to refill itself.
Before buying, list the devices you use, when you use them, and what equipment is already installed. A charge controller regulates electricity flowing from panels to the battery, so it must suit the system. An inverter changes battery power into the kind used by compatible household devices. Assess the complete system for compatibility rather than treating each component as a stand-alone upgrade. Actual available power depends on the equipment, conditions, and use, so don’t assume a setup will provide a fixed number of off-grid days.
Which comfort upgrades help across many travel days?
Choose comfort changes based on repeated routines. If you spend evenings reading, better-positioned lighting may see daily use. If long driving days leave you uncomfortable while parked, consider seating or climate improvements that suit the RV and its power capacity. Storage changes can help keep frequently used gear accessible, but added cabinets, organizers, and packed belongings all contribute weight.
For RV upgrades for cross country trips, compare each comfort idea with its real use: how often it helps, what it depends on, and what it adds to the loaded RV. Prioritize useful improvements over decorative changes that won’t meaningfully improve travel days. Even a compact addition deserves a compatibility and weight check before it goes aboard.
Plan RV Upgrades Around Weight, Compatibility, and Installation
An upgrade can fit physically and still be the wrong fit for your RV. Added equipment changes the loaded setup, and electrical or mounting requirements can introduce dependencies you may not notice until work begins. Before purchasing, check each proposed change against your RV’s documentation, existing equipment, and travel needs.
Upgrade weight adds up, so evaluate the combined load rather than considering each purchase on its own. Payload is the weight capacity available for occupants, cargo, and added equipment, as defined for your RV in its documentation. Consult both your RV and tow vehicle information for the applicable limits. Consider the complete travel-ready combination, not just the new equipment in isolation.
How can you avoid exceeding the RV’s available capacity?
Make an inventory before choosing several upgrades. Record the equipment already installed, the items you plan to bring, and every proposed addition. Include associated parts and mounting hardware, not just the main item. Then compare the resulting setup with the capacity information in your RV and tow vehicle documentation. Don’t rely on a universal capacity figure or assume that similar-looking RVs share the same limits.
If you can’t confidently determine how the loaded setup compares with those limits, resolve that uncertainty before adding equipment. An inventory is useful, but it’s still an estimate. Account for what will actually travel with you, including passengers and gear added close to departure.
How should you sequence work and compatibility checks?
Follow this order before placing an order or scheduling work:
- Identify the need. Describe the recurring problem the upgrade should solve and what improvement you expect in everyday use.
- Check fit. Review mounting space, dimensions, connections, and the relevant RV or vehicle documentation.
- Assess weight. Add the proposed equipment and related hardware to your travel-load inventory.
- Review dependencies. Check whether the change requires compatible wiring, charging equipment, controls, or another upgrade first.
- Schedule the work. Complete prerequisite work before dependent upgrades, then leave time to test the finished setup.
Some straightforward tasks, such as organizing storage or replacing an accessible component according to its instructions, may suit an owner with the right skills and tools. Electrical changes, structural mounting, and towing-system work can require specialized knowledge. Don’t assume every task is a safe DIY project. Follow equipment makers’ instructions and don’t attempt work beyond your experience; for complex campervan setups, exploring professional builders such as route300campers.co.uk can show how balanced electrical and layout installations are engineered safely.
For towing-related planning, consider how a ProPride 3P Hitch setup fits your travel trailer and overall combination. Its Pivot Point Projection technology is designed for sway control, but the hitch still needs to suit the towing setup. Applying The Responsible Towing Standard means checking fit, load, and dependencies before committing, then carefully reviewing the completed work.
Towing Stability Upgrades for Cross-Country RV Trips
Solar capacity and comfortable seating can make travel days easier, but they don’t address how a trailer behaves behind the tow vehicle. A travel-ready setup also depends on a suitable match between the tow vehicle, trailer, hitch, and load. If trailer movement makes it harder to feel settled behind the wheel, treat it as a towing concern to evaluate, not something a comfort upgrade can solve.
Why consider a dedicated sway-control hitch for a long trip?
Trailer sway is side-to-side movement that can affect driver confidence and the towing experience. A sway-control hitch is one part of a properly matched towing setup, alongside appropriate loading and attention to vehicle and trailer manufacturers’ guidance. It isn’t a universal safety guarantee, and it doesn’t replace responsible driving or good preparation.
Different sway-control approaches work differently. Friction-based systems use resistance between components to help oppose movement. The ProPride 3P Hitch uses patented Pivot Point Projection. In plain language, its design places the effective pivot point closer to the tow vehicle, changing how trailer movement acts on the combination. That’s a distinct engineering approach, not a promise that every hazard disappears.
Where does the ProPride 3P Hitch fit in an upgrade plan?
Consider a hitch upgrade if you’re reviewing trailer movement as part of your towing setup, particularly before a long trip with sustained highway driving. ProPride sells the ProPride 3P Hitch for a range of travel trailers, including Airstream, Jayco, and Grand Design. Those examples aren’t a substitute for checking how a hitch fits your specific tow vehicle and trailer combination.
Before making a decision, review the setup as a whole: vehicle and trailer ratings, loading, hitch compatibility, and how the combination behaves in normal towing conditions. If you’ve noticed recurring sway or feel unsettled even after checking the basic setup, take that concern seriously and examine the towing system rather than relying on added power or comfort features to improve it. A hitch can be an important upgrade, but no single component removes all road risks.
For a closer look at the design and its role in managing trailer sway, explore the ProPride 3P trailer sway control hitch. If you’re weighing options for a cross-country towing setup, take time to understand the design, fit, and requirements before deciding whether it addresses your needs. That careful approach is The Responsible Towing Standard.
Make Your Next Upgrade a Confident One
Before you head out, turn your upgrade decisions into a clear travel plan. Choose the issue you most want to address, note what your current setup can support, and decide how you’ll tell whether the change has helped. That gives every purchase a purpose and helps keep the RV ready for the trip you’re actually taking.
For RV upgrades for cross country trips, towing confidence deserves the same careful thought as comfort and convenience. If trailer movement remains a concern as you prepare, take time to understand the hitch design and how it fits your towing setup. A thoughtful choice can support a steadier, more reassuring journey, alongside proper loading, maintenance, and attentive driving.
Explore the ProPride 3P Hitch and consider how it fits your towing setup. Make your decision with the full combination in mind, then set out knowing you’ve prepared with care. The road ahead is yours to enjoy.
Frequently Asked Questions
How should I prioritize RV upgrades before a cross-country trip?
Use your past trips to identify which changes deserve attention first. For each recurring problem, write down when it happens, how it affects the trip, and whether it could prevent you from traveling comfortably or reliably. Then compare that list with your planned route and camping style. This practical review helps you choose RV upgrades for cross country trips based on experience rather than appealing features alone.
Can RV upgrades affect how much gear I can carry?
Yes. To estimate the effect, use the listed weight for each upgrade and its included components, then add the gear and supplies you expect to bring. Product packaging or manuals may help identify items that are easy to overlook, such as mounting hardware. If you’re comparing alternatives, account for the complete installed setup rather than looking only at the headline component. Recheck the estimate when your passenger or cargo plans change.
Do I need solar panels for a cross-country RV trip?
No. The length of a trip alone doesn’t determine whether solar is useful. Before deciding, keep a short log of which electrical devices you use, when you use them, and whether you’re usually connected to campground power during those periods. If you rarely need electricity away from hookups, panels may not address a real problem. If you do, use the log to make your power needs more specific.
Will a tire-pressure monitoring system prevent a tire problem?
No. It can’t prevent every tire issue, so don’t treat a quiet display as proof that a tire is in good condition. Learn what your system’s normal readings and warning settings look like, and read its instructions before departure so an alert won’t be unfamiliar on the road. If a warning repeats after you’ve stopped and assessed the situation, don’t simply silence it. Investigate the cause before continuing.
Can I install RV upgrades myself?
Sometimes, if the task matches your skills and the instructions are clear. Before starting, read the full installation guide, check the required tools, and identify any step involving wiring, structural changes, or the towing connection. If you can’t confidently explain how the finished component should operate, pause rather than improvising. After the work, verify its operation as directed and keep the instructions accessible for future checks.
Is a sway-control hitch worth considering for a long RV trip?
It can be worth evaluating if you’ve experienced recurring trailer movement or feel uneasy with your current towing setup. Make a note after each trip of the conditions and loading at the time, without trying to diagnose or adjust equipment while driving. That record can help you assess whether a hitch change is relevant to your specific combination. Treat the decision as one part of careful towing preparation, not a stand-alone fix.
What should I check before buying several RV upgrades at once?
Before bundling purchases, check the instructions for each item and map which upgrades depend on another component being installed first. Then consider completing and testing one connected change at a time. If several parts are changed together and something doesn’t work as expected, it can be harder to identify the source. Keep product information and installation notes together so you can refer to them during setup and later troubleshooting.